


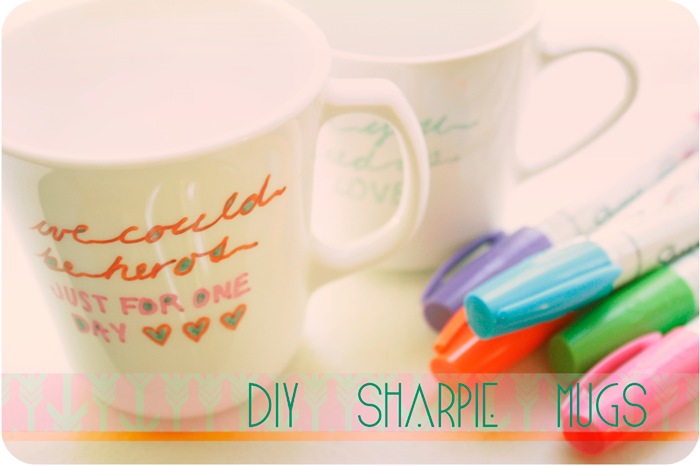
Today I thought it would be fun to share my technique for the DIY Sharpie Mugs I created for Amber's bachelorette party! When starting this project I tried a few different tutorials online (which didn't work for me.....the sharpie kept washing off), and ended up with the following combination finally giving the result I had hoped for.....
Supplies:
- White Ceramic Mugs (already glazed, like the kind you find at any home goods or thrift store)
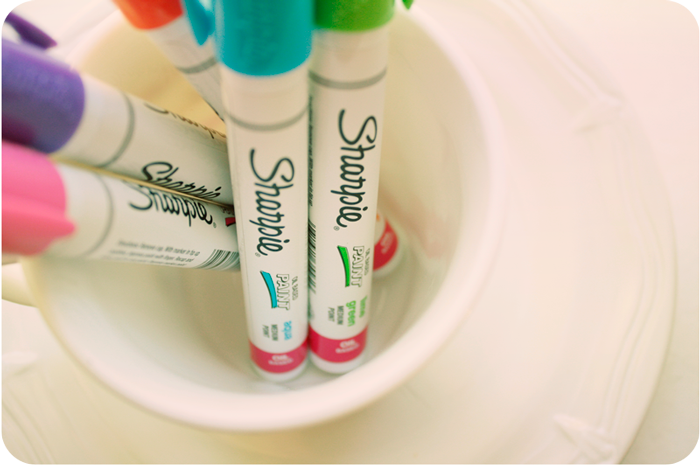
- Sharpie Paint Pens (in the colors of your choice)
- Rag
- Dish Soap
- Oven
Directions:
- Thoroughly clean your mugs. I used Bar Keepers Friend to get off any stains from the thrift store mugs.
- Begin to draw your design with the Sharpie Paint Pens onto your mug. I chose to use sayings from one of Amber's favorite love songs, Elephant Love Medley.
- If you mess up, just wet your rag with water, add little dish soap and scrub it off. Wipe the mug dry before trying at it again.
- Once your design is complete bake your mugs in the oven at 400 degrees for 30 minutes.
- After the 30 minutes is over, turn the oven off and let the mugs cool with the oven door open.
- When the mugs are completely cool you can now hand wash them and they are ready to use!
Notes:
- Originally I tried using the regular Sharpie permanent markers and my design washed off. This was not a permanent solution for me. Make sure to use the Sharpie Paint Pens.
- These mugs are hand wash only. Do not put in the dishwasher.
- If you decide to use the colored Sharpie Paint Pens instead of just black, most of the colors change quite a bit from baking in the oven (they darken).
- I found that while baking my mugs they did make the kitchen smell a bit odd.
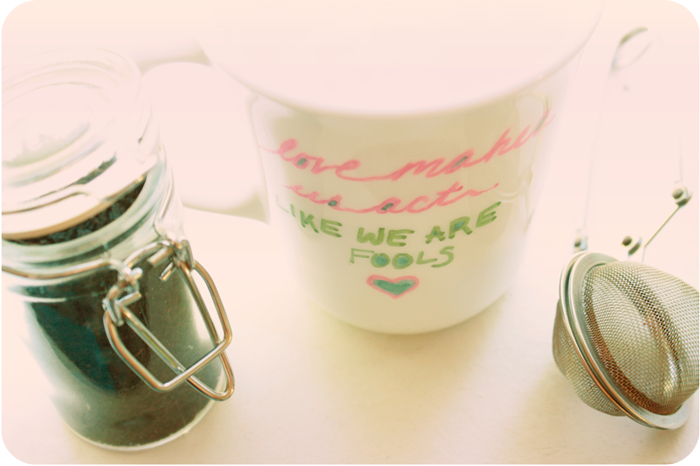
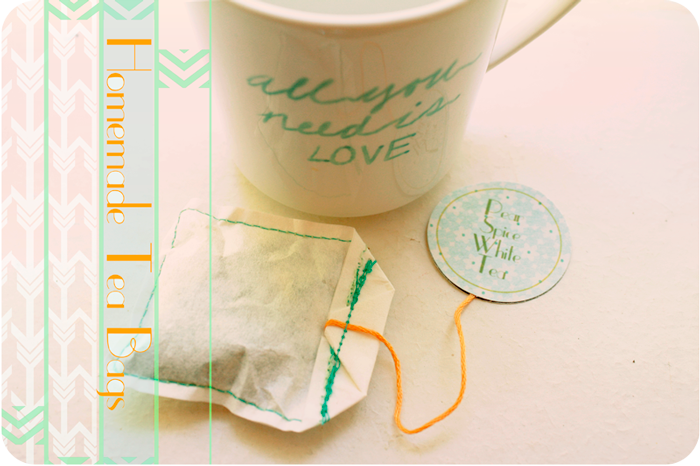
And here is a peek at one of the homeade tea bags I assembled to go inside the mugs as the bachelorette party favor. I used THIS tutuorial for making them, and it worked great! I had to figure out my own measurements, and ended up desiging my own labels, but other than that everything else is mostly same. Now if only it was cool enough to drink hot tea today!?! I don't know about you, but the last couple days have been warm here in Seattle ; ) Link me up if you've tried any of these DIYs yourself and enjoy!
Very cute!
ReplyDeleteI was so so so excited to see this in my Google Reader today. You're back! And you're back with a wonderful tutorial. Even this seamstress can handle this DIY!
ReplyDeleteOoo what a cute tutorial! I've seen these posted around, but also heard about the problems with getting them to last. Great to see you've tested this thoroughly!
ReplyDeleteCan I use microwave to bake it?
ReplyDeleteI don't think using the microwave to bake it would work.....however I haven't tried it before so I don't know for sure.
DeleteI also tried regular Sharpies and it didn't work as well. I will try using the sharpie paint pens.
ReplyDeletethank you so much for posting this because my first attempt at these DIY mugs failed as did yours lol. what i was wondering was were you pens oil based, or water based paint pens??
ReplyDeleteHi Savannah! The Sharpie Paint Pens are oil based.
Deletethanks again!!!! :D
Delete
ReplyDeleteThank you for the info. It sounds pretty user friendly. I guess I’ll pick one up for fun. thank u
Sharpie Permanent Markers
This mug solves the problem of how to dunk a large cookie without breaking it into pieces. While most people solve this problem by using a bigger mug, the Taca (Portuguese for cup) provides more cookie space by expanding the mug into the handle. Now coffee lovers can dunk their oversized cookies neatly without losing a crumb. steampunk mugs
ReplyDelete