Friday, November 29, 2013

{class} christmas crafts 2013


Welcome to this years Christmas Crafts Class! This is a local class and is open to friends and family in the Sequim, WA area only. It is not available as a shipped item at this time. There will be Photos of the crafts we are creating coming soon.....2 Christmas cards (great for holding gift cards), 3 gift tags (to make your presents pretty), and two holiday garlands (which can be gifts or used as decoration in your home). The class is approximately 3 hours long. Snacks and beverages will be provided.

You can purchase this class HERE to save your spot. CLASS IS NOW OVER.  A big thank you to everyone who attended!!!

The class is $30.00 Sunday, December 8th from 3-6pm.

There are only a few spots currently available for the 2013 Christmas Crafts Class (less than 10), so please email me at blumearts(at)gmail(dot)com if you need to make arrangements for saving your spot.  I don't want to over or under book this class : )

Wednesday, November 27, 2013

{giveaway} winner


Congratulations, pinwheelsblog!  You are the winner of one of the Christmas Countdown Mini Kits!!  Please email me your mailing address at blumearts(at)gmail(dot)com.  A big thanks to everyone for entering and all the wonderful ideas!  For the winner on Instagram, you can visit my feed.  Happy Thanksgiving!!!

Monday, November 25, 2013

{guest post} from Brittany | her christmas countdown mini base


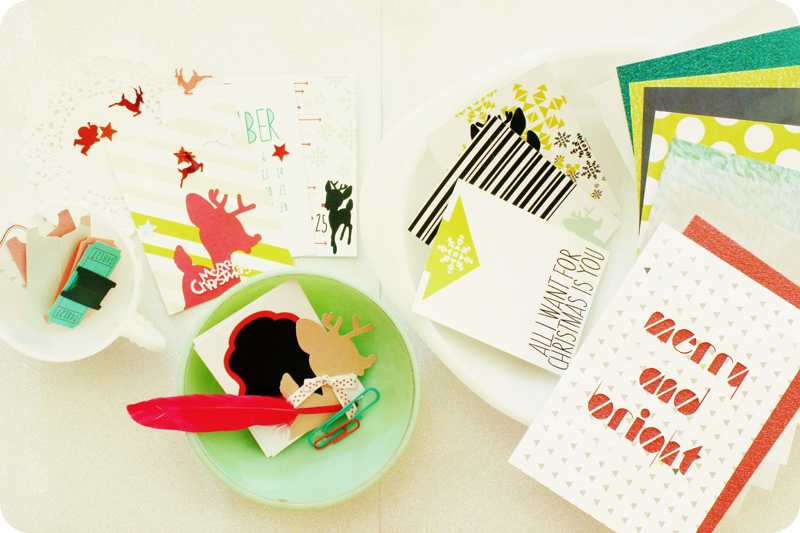
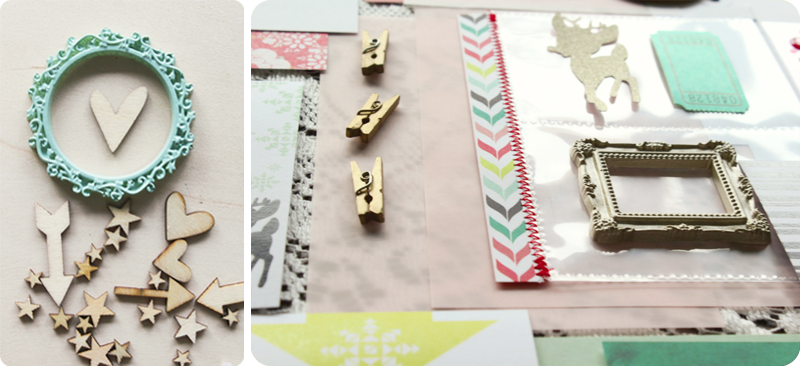
So you know those amazing three mini frames in the Christmas Countdown Kit (two shown below)?! Well, today's guest is the lovely person who made those little pieces of art!  Her collaboration with this kit has been a dream.....so without further ado, meet Brittany:
 
{B&G Market} CCK | KraftyBuns FramesHey everyone, Brittany here A.K.A. KraftyBuns. I'm excited to be a part of Carrie's blog today and even more excited to be sharing my base mini album using her Christmas Countdown kit!! First I'll let you get to know me a little more!
 
What is your favorite color?  My favorite color seems to always change but right now I'm loving gold and mint.
 
Is there something unique you do when doing a favorite hobby? Nothing to unique unless making a mess can be considered ;). When scrapbooking I like to just have music playing from Pandora and when crocheting (a new little hobby I just picked up) I like to catch up on shows from Netflix.
 
What's something little you enjoy during the month of December? Although I'm not a huge fan of freezing to death, I love have a fire going and an excuse to drink hot cocoa. I also love wearing my boots that I'm obsessed with and fuzzy socks!
 
Tell us something interesting about one of your pets. I swear my male cat, PJ, is half human. He knows when he's not suppose to do something so he will stare at me and do it slowly as if I can't see him. He also smacks me if I try to walk away and he doesn't want me to stop petting him lol!
 
What would be a dream come true? To start a family and have an amazing craft room of course! I also have this dream of winning the lottery even though I don't play (don't we all :P).
 
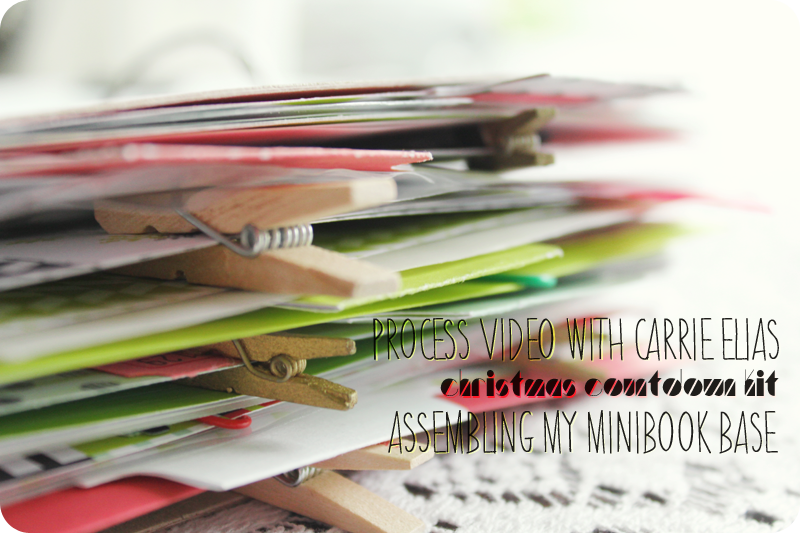
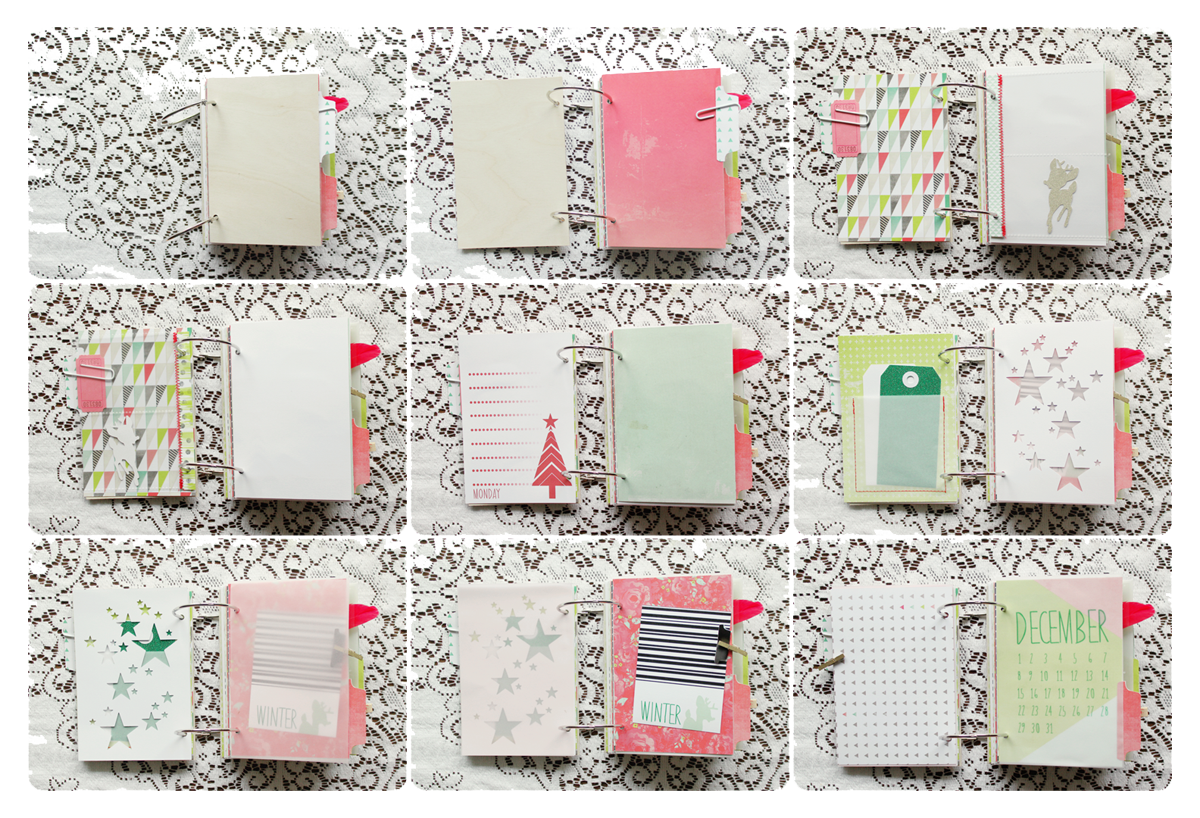
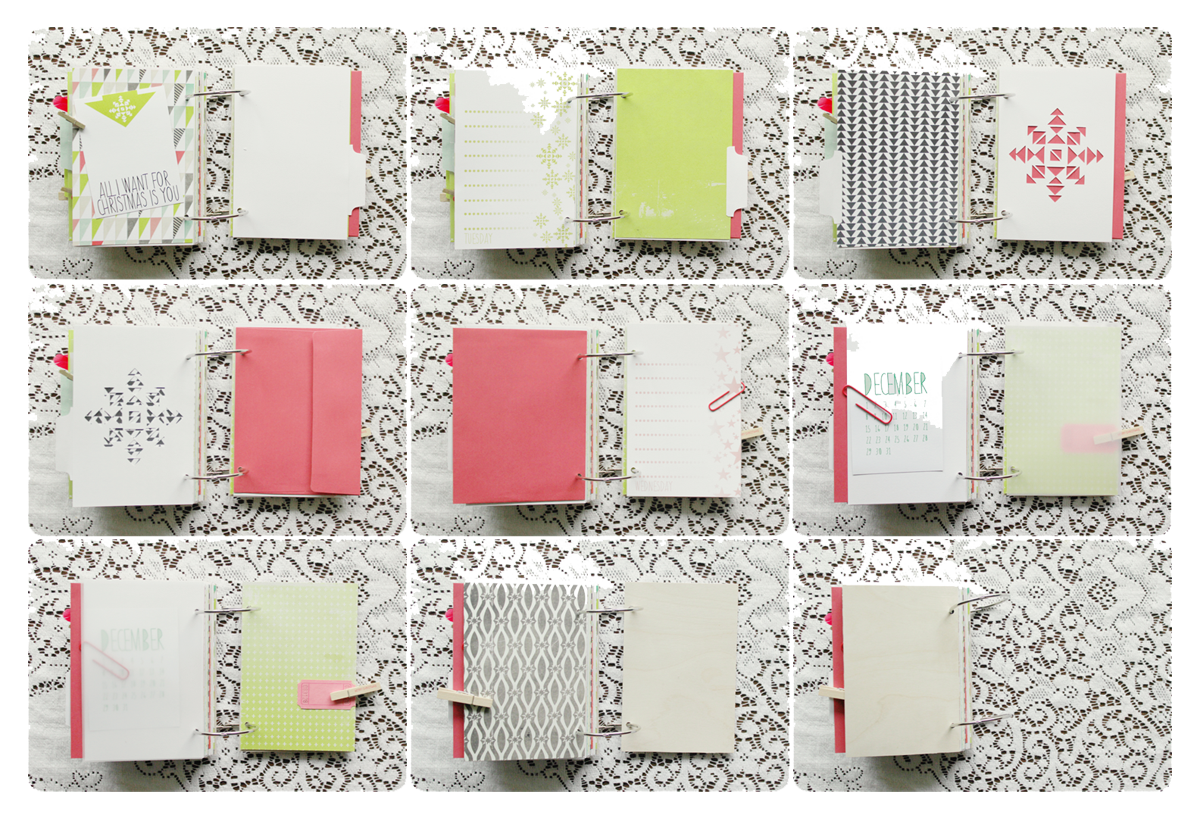
I was so excited when Carrie asked me to make some embellishments for these kits and even more excited knowing I get to play with the kit! I've never done an album just for the month of December and I can't remember how long it's been since I've made a mini! I recently made a quick little post here (http://kraftybuns.blogspot.com/2013/11/christmas-countdown-prep.html) showing all the supplies I pulled out to possibly use with the kit. Here is how the base and cover came out!
 
For the cover I wanted to keep the wood showing for the most part, I love the way it looks! I went ahead and did some paint splatters in mint and gold (the same colors I used for the frames). I ended up not loving the way it turned out because my paint was super cold, but after it all came together I ended up liking it more! I took a little snowflake stamp, some white embossing powder and added them directly to the cover. I took the star diecut from the kit, added some mod podge to it and stuck it to the cover. I went ahead and embossed the year on one of the wooden chalkboard embellishments and called the cover done!
 
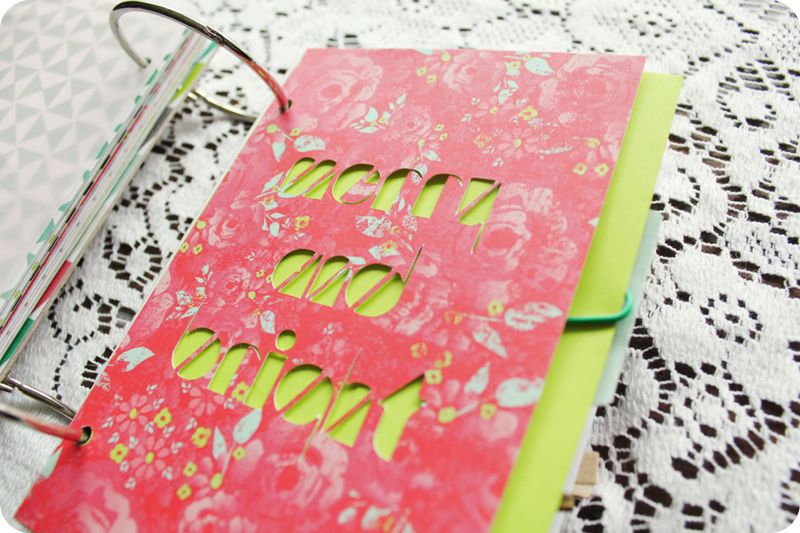
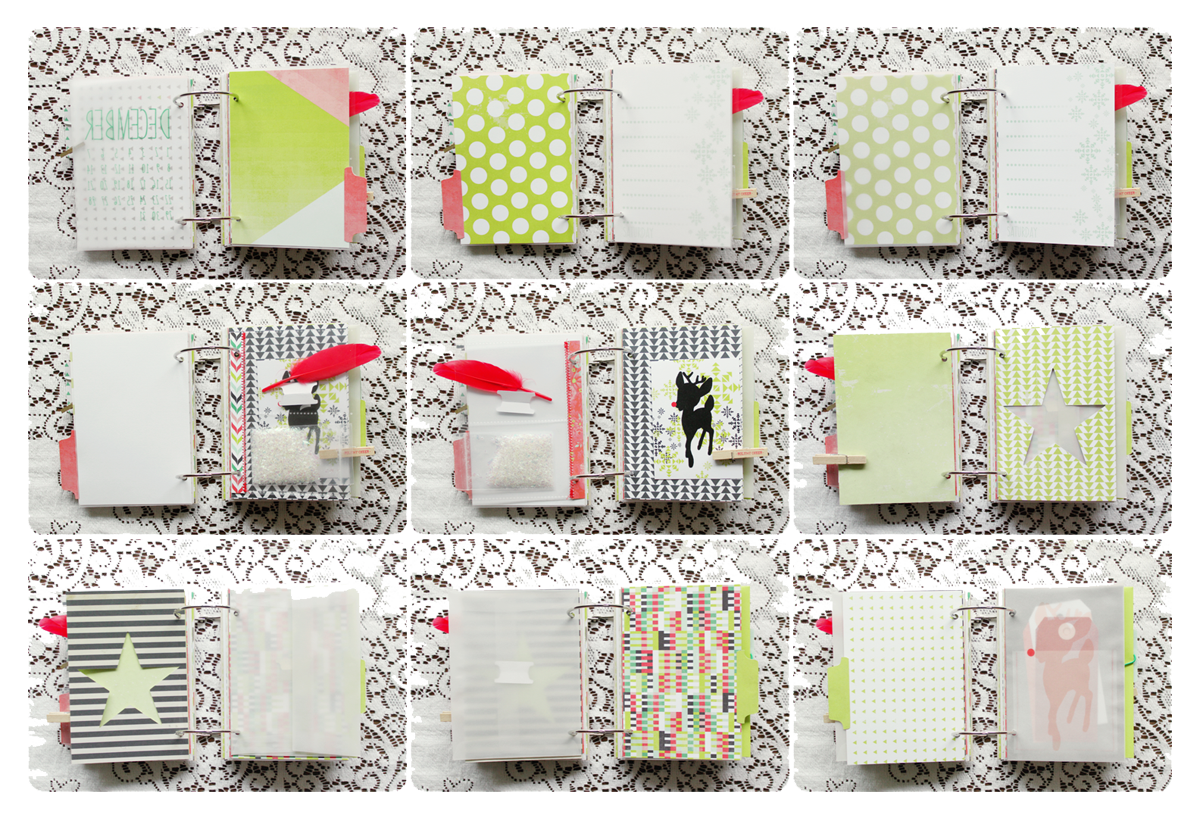
I went ahead and punched holes in most of the papers from the kit to add to the binder rings. I left some out in case I want to make some paper embellishments as I go. I grabbed some paper clips and clothes pins from the kit and started clipping some flat embellishments onto random pages.
 
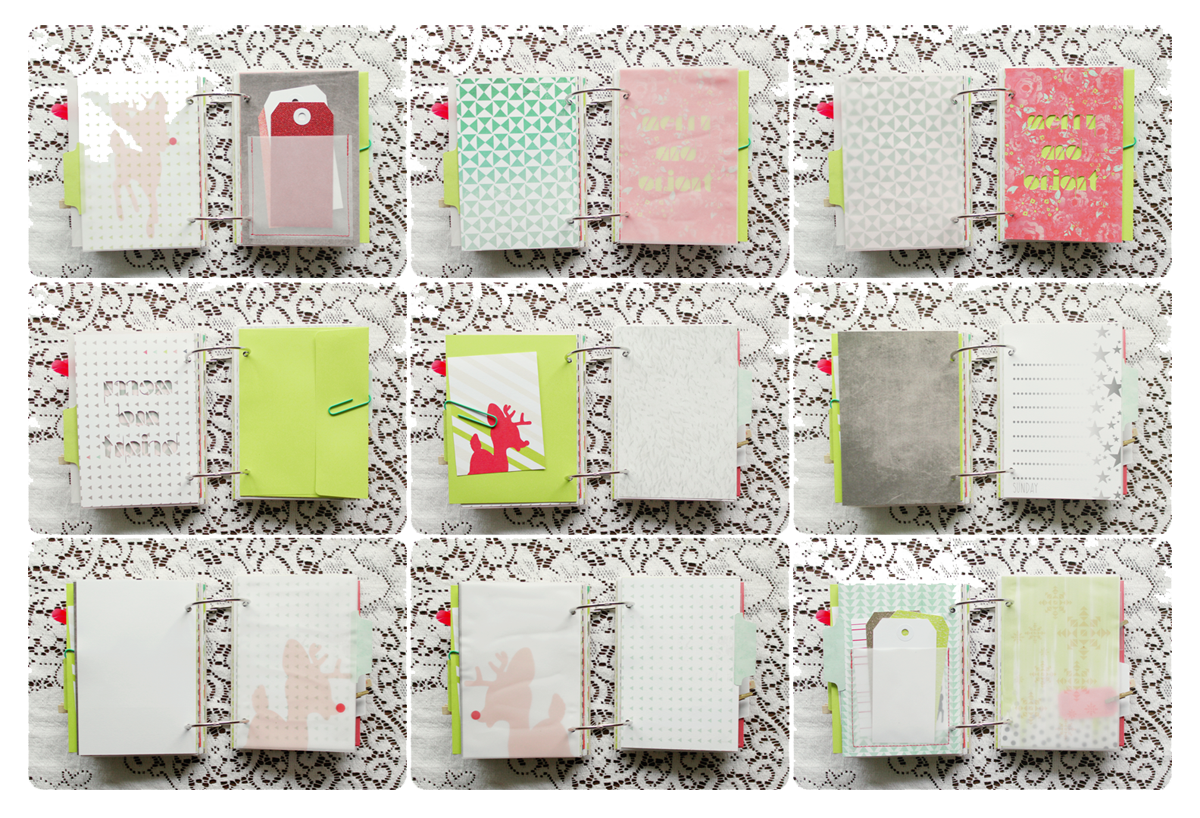
This little diecut deer is the cutest! I folded over a doily, added a tag behind and a clothes pin!
 

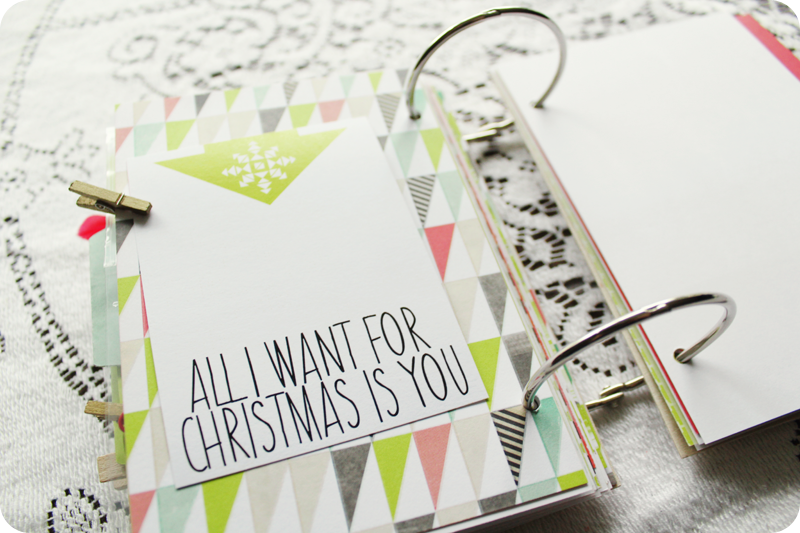
I wanted to add some bling to the vellum envelope. I cut a strip of the glitter paper from the kit and added it to the flap!


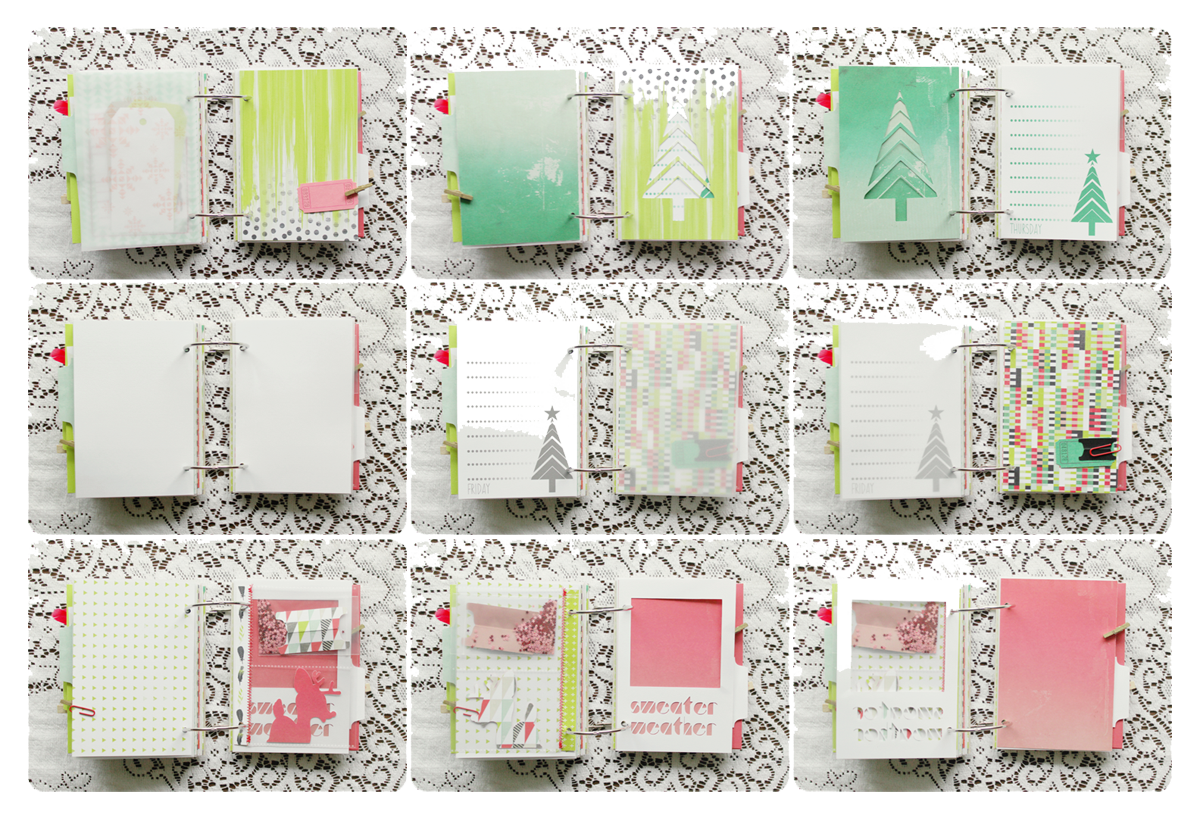
So there is the base of my Christmas Countdown mini! Loving the colors and custom details in this kit and I so can't wait to start adding the photos and embellishments!! Thanks so much Carrie for having me!
 
So what do you all think? Pretty amazing, right!? I really love the clean and crisp feel of her album so far, and I know I'll be using her fun idea of adding paper to the edge of an envelope flap!  Also, you should go check out her Etsy shop and BEG her to make more of those delicious frames so you can  purchase extras ; )

Thanks so much for sharing Brittany!  I'm looking forward to see how your album comes together throughout the month of December.  XO

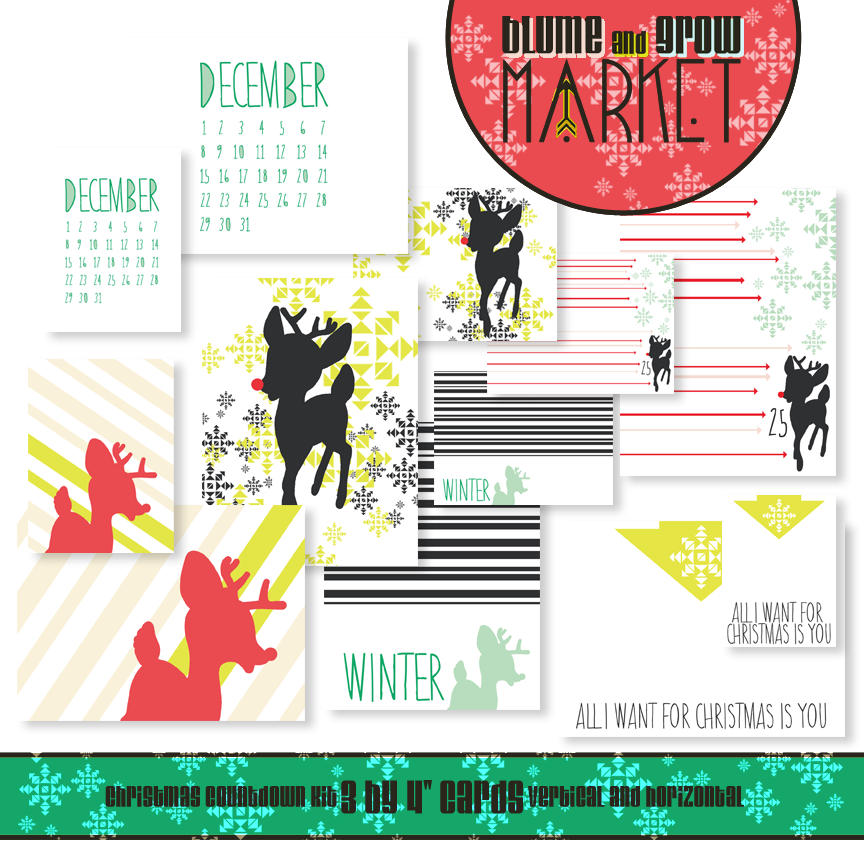
You can purchase a Christmas Countdown Kit HERE. (while supplies last)
See the details of everything in the kit with my video HERE.
Watch Amanda's video while she assembles her mini base HERE.
Watch Val's video of her mini base HERE.
And last my video putting together the base of my mini HERE.

Don't forget to enter my GIVEAWAY.....it's open until Tuesday the 26th at 11:59pm PST!

Sunday, November 24, 2013

{giveaways} two mini christmas countdown kits NOW CLOSED

{Christmas Countdown} Mini Kit Happy Sunday to you all!  It's almost Thanksgiving and so I thought it would be nice to share some of my market goodies with a giveaway.  I am giving away two Mini Christmas Countdown Kits (pictured above).  One here on my blog, and one on Instagram (feel free to enter both giveaways).

To enter the giveaway here on my blog, just leave a comment telling me what you'd like to see next in my Blume and Grow Market. 

To enter the giveaway on Instagram, just hop on over to Instagram and find me under @carrieelias.  All you have to do is find my giveaway post (photo) and tag a friend.  One tag per entry please, but you can enter as many friend's as you like.

This giveaway is open to everyone.....including international.

Giveaway closes Tuesday, Nov. 26th at 11:59pm PST. Winners announced Wednesday, Nov. 27th.  GIVEAWAY NOW CLOSED

If you are thinking about purchasing one of my full size Christmas Countdown Kits, now is a great time to order so you can receive it before December 1st.  To view all the inspiration so far using the kit (and here is LOTS), just click HERE : )

Good luck! XO

Friday, November 22, 2013

{video} christmas countdown kit | val's minibook base


Today my sweet friend Val is here to share more scrappy goodness with you all!  Below is a fun process video of her assembling the base of her Christmas Countdown minibook.  I am so excited it's almost time to start filling these December Daily's, and Val's is looking so cute!  I asked her to share some fun facts about herself and this is what she said:
 
Being near or in or around the water always makes me feel at peace, I love the water.  I speak Spanish fluently.  I just got my first tattoo and it hurt some but I want another.  Donkeys are my favorite.  I love pink and aqua.
 
I've known Carrie online for quite a few years and she's a big scrappy inspiration to me! When she asked If I would be interested in helping out with her mini I jumped at the chance! This kit is sooooo awesome and over flowing with product! It's versatile and easy to set up with how she designed it.  I'm not usually someone who preps when scrapping. I using pic photos then choose what supplies etc. so this was a little backwards for me, but I can see how prepping before hand comes in very handy. I did not permanently glue anything together so that I can change things if needed as we go along.  I mostly just built base pages and put them in a loose order in the album. I didn't even punch holes yet cause If I change paper then want to use it for something else I didn't want it to have holes in it.  So here's my video of me prepping my album with Carries Christmas Countdown kit.


Check back soon for another minibook and more inspiration.....and thanks so much for sharing Val! Your mini is adorable, and you are an inspiration to me too!!!
 
You can purchase your Christmas Countdown Kit HERE (while supplies last).
Take a detailed look at everything included in the kit HERE.
Watch Amanda's process video putting her book base together HERE.
Watch my process video assembling my minibook base HERE.

Wednesday, November 20, 2013

{video} christmas countdown kit | assembling my minibook base

{christmas countdown kit} assembling my minibook | side viewThis week I finally made time to put together my December Daily minibook base. So far everything I used is from the Christmas Countdown Kit (still available while supplies last). Here are a couple close up shots.
 
{christmas countdown kit} assembling my minibook | die cut {christmas countdown kit} assembling my minibook | graphic card
And the process video. I apologize for the lighting. I'm still adjusting to the Seattle weather/natural lighting going from bright to dark back to bright again...haha : )


You can click on any of the photos in this post to view them larger.
{christmas countdown kit} assembling my minibook | page 1
For many of the pages I attached cards and embellishments so I would remember where I wanted to use them. I also left the back of the white journaling cards blank in case I wanted to attach a photo there. Most of my pics are shot with horizontal orientation, but I am totally okay with attaching them to a vertical page and just turning the page to look at them.
{christmas countdown kit} assembling my minibook | page 2
I'll probably use some of the plain vellum pages for journaling by running them through my typewriter or printer.  You can see my DIY for stamping/printing on vellum HERE.
{christmas countdown kit} assembling my minibook | page 3
And there are still lots of extra double sided papers, all the plain white papers, and more embellishments left in the kit for layering with photos and such.
{christmas countdown kit} assembling my minibook | page 4
I have a plan for my front cover and will most likely try it out the beginning of December since it requires using a photo (fingers crossed my idea works ; ). Please email or leave a comment with any questions.....and make sure to check back here soon. There will be two more minibook bases put together by a couple of my friends coming soon. XO
{christmas countdown kit} assembling my minibook | page 5
You can purchase your Christmas Countdown Kit HERE.
You can watch a video showing everything included in the kit HERE.
And the beautiful Amanda has a process video of her minibook base HERE.

Monday, November 18, 2013

{christmas countdown kit} cover by christina


I have some wonderful scrapbooking friends, and one of them is the talented Christina!  She has been creating with the Christmas Countdown Kit, and made an awesome cover using the 4x6" wood sheets.  Here's what she said about putting the cover together:
 
I misted the front cover (wood sheet) with the chartreuse Color Shine.  Then after I pulled the mask off I went over it lightly with the gold Color Shine.  After all my embellishments were adhered I modgepodged everything.  While it was still damp I sprinkled on the mini star glitter, and then modgepodged that. Heidi Swapp did this on one of her videos with glitter and I thought it was a fun thing to try.  I love how it turned out, and might try it on future project too.  Also, there is stencil/mist on the back of the album (wood sheet) as well.

So what do you think? Pretty inspiring and creative, huh?! Thank you so much for sharing Christina!!! XO
 
P.S. If you're interested in a Christmas Countdown Kit of your own there are a couple left HERE.

Thursday, November 14, 2013

{guest post} over at amanda o'banion's blog

{blue haired me} Carrie Elias
Today I am so honored to be featured as a guest on Amanda's amazing blog!  Many of you may know her from her awesome YouTube videos (which is where I originally found her), but her blog is a wonderful read with lots of creative inspiration that I know you will enjoy just as much as I do.
 
So what type of guest post do I have for you over at her end of the Internet?  Well, if you've ever wondered about my creative process, my favorite techniques, how I decide to create my layouts, or why I do it all (with lots of examples), head on over to seeeeeeee : )
 
(GIVEAWAY NOW CLOSED.....Congratulations Kate Morrow!) When you visit, don't forget to leave a comment so you can be entered for a chance to win my giveaway.....a set of six vertical 3x4" graphic cards I designed and printed out for my Christmas Countdown Kit (digital version of both vertical and horizontal shown below).  They would be super cute in Project Life, a layout, or for making Christmas cards!!!  XO
B&G-Market-CCK-3by4Cards

Thursday, November 7, 2013

{scrapbook video} carta bella wildflower | do you know, i love you so?


Hello All! A few weeks ago, Carta Bella contacted me about creating a couple projects with one of their amazing new paper lines called Wildflower. These bright and lovely papers were so happy of course I said yes : )
 
This is my first layout using their beautiful papers, so take a peek and I hope you enjoy. You can see all the details in the process video below.  XO


Saturday, November 2, 2013

{scrapbook video} inside the christmas countdown kit


Want a peek at what's inside my Christmas Countdown Scrapbook Kitst?   Not only do I share everything in this fun holiday kit, but there's also ideas on how to use them : ) The kits are currently for sale in my Blume and Grow Market.   Hope you enjoy today's scrapbooking inspiration! XO

Friday, November 1, 2013

{now on sale} christmas countdown scrapbook kit


It all started when I decided that I wanted to document December and the days leading up to Christmas.  I've attempted this project the last few years without being able to complete it.  So, this year I designed a kit from my idea of what I could realistically accomplish.

My plan:  to have one page represent one day from December 1-25th.  Since I tend to prefer two page spreads, but knew I wouldn't be able to make it work for this project, I went about creating different types of pages so each day will look flattering side by side.  I handmade paper and vellum pocket pages and tags, found pretty envelopes, handmade custom pocket pages (page protector style), designed and cut 4x6" graphics to layer with photos or use as a divider in between two sheets of patterned paper and so on.  Of course my plan may change once I start assembling the skeleton on my book, but for now I'm pretty happy with the idea.  Here's what's included in the kit:


  • 25 double sided Glitz Design Finnley papers cut to 4x6 inches
  • 2 pieces of wood to use as the front and back covers cut to 4x6 inches
  • 2 two inch binder rings
  • 7 custom journal cards for Monday-Sunday sized to 4x6 inches
  • 6 custom die cuts (snowflake, star, stars, tree, merry and bright text, and sweater weather text with frame) sized to 4x6 inches
  • 6 custom 3x4 inch graphic cards
  • 4 pieces of custom printed vellum (two reindeer, a calendar, and snowflakes) sized to 4x6 
  • 7 sheets of plain white cardstock sized to 4x6 inches
  • 3 sheets of plain vellum sized to 4x6 inches
  • 2 sheets of plain pink vellum sized to 4x6 inches
  • 3 handmade vellum pocket pages sized to 4x6 inches
  • 3 handmade pocket pages each with two pockets sized to 2.5x3.5 inches
  • 3 matching envelopes (vellum, red, and chartreuse) sized to 4.375x5.75 inches
  • 3 specialty papers (chalkboard, POW striped glitter, and a cream pearlized cardstock) sized to 4x6
  • 8 handmade tags (5 glitter in red, green, pink, gold and chartreuse, and 3 white)
  • 2 small alphas (one black letters and numbers 74 pieces, and one white pearl micro letters with lots of pieces....too many to count :)
  • 3 small doilies
  • 3 handmade tags with chalkboard on one size and wood on the other in various sizes
  • 1 piece of chalk
  • 2 hand stamped (in red) small clothes pins with sentiments "Holiday Cheer" and "Merry Christmas"
  • 3 mini clothespins in gold
  • 3 small custom frames made by @kraftybuns in 3 different shapes and one of each color, white, mint and gold
  • 100 pure white sequins also by @kraftybuns
  • 2 feathers (red, white)
  • 1 small bow (white with red polka dots)
  • 7 custom two inch index tabs (5 cut from double sided paper, and 2 in white)
  • 7 custom one inch index tabs (3 gold glitter, one white, 3 chalkboard)
  • 4 paper clips with three large (in red, green, and white) and one small (in red)
  • 4 small tickets (3 pink, and 1 green)
  • 15 studio calico wood veneer stars
  • 6 studio calico wood veneer arrows and hearts combo
  • 1 package various sized red rain dots approximately 43 pieces
  • 1 package various sized rhinestones in 3 shades of green approximately 34 pieces
  • 1 package iridescent red and pink mini star confetti
  • 1 package vintage style snow
  • 1 package of confetti white cardstock stars approximately 23 pieces
  • 1 package Christmas shaped sequins in different shapes (reindeer, santas, merry Christmas text, and stars) approximately 16 pieces
  • 2 small die cut reindeer sized to fit into the 2.5x3.5 pocket pages (in gold glitter and red)
  • 1 medium sized star die cut from double sided paper
  • 5 yards white with gold bakers twine
  • 4 feet gold washi
  • 1 set of 6 digital 3x4" graphic cards (in vertical and horizontal)
  • 1 set of 7 digital 4x6" journaling cards (vertical, Monday through Sunday)
  • 1 set of 8 digital 4x6 cut files (tree, star, stars, merry and bright text, sweater weather text with frame, snowflake, and two different reindeer)

  • The items listed above are designed for a 4x6 inch vertical minibook, but you can cut up the pieces and use them however you like.
     
    Below are the digital elements I designed for this project and more snapshots of some of the details.  Feel free to email me (just click on "contact" in the navigation bar) with any questions.  Pricing and additional details can be found in my Blume & Grow Market.  Happy crafting!!!  XO