Showing posts with label Food Love. Show all posts

Thursday, October 16, 2014

{autumn recipe} german pancake with apples & cinnamon

APPLE CINNAMON GERMAN PANCAKE

Serves 2-4

Ingredients:
  • 2 granny smith apples, cut into slices (I left the skin)
  • 1/4 cup turbinado raw cane sugar
  • 2 teaspoons ground cinnamon
  • 4 eggs
  • 1/2 teaspoon salt
  • 3/4 cup all-purpose flour (GF: use brown rice flour)
  • 3/4 cup milk
  • 1/2 teaspoon pure vanilla extract
  • 4 tablespoons salted butter
Directions:
  1. Preheat oven to 400° F. Make sure the oven rack is in the middle of your oven.
  2. In a small bowl, combine sugar and cinnamon.
  3. In a medium bowl, combine eggs, salt, flour, milk, and vanilla extract and beat until batter is smooth.
  4. In a 10" ovensafe pan (I used Calphalon) or a cast-iron skillet melt butter over medium heat, tilting pan to cover sides. 
  5. Add apples and sprinkle with sugar and cinnamon mixture. Stir and then remove from heat (if you let the apples cook too long they will become very soft/mushy in the oven).
  6. Pour prepared batter over the apples into the baking pan. 
  7. Place pan in preheated oven and bake approximately 20 minutes or until puffed up and lightly browned and knife comes out fairly clean (it may puff irregularly in the center); remove from oven (the pancake will begin to deflate).
  8. Serve warm, cut into quarters.
To Make This Gluten Free:  I replaced the all purpose flour with the same amount of Bob's Red Mill Brown Rice Flour.  It didn't puff up quite as much as regular flour, but was still really yummy.  I've made it a few times now and Ryan always comments on how delicious it is!

Notes:  I left the skin on the apples and liked it a lot.  However, traditionally you'd peel the skin off.  I've also tried this recipe with a little more of the cinnamon sugar mixture for when I have a sweet tooth, but another option is just adding powered sugar on top. Most of the time it's plenty sweet without anything extra though.

I also like to add whole milk ricotta cheese (a 1/2 cup or so) and just add a little less milk. It makes this dish a little more rich and filling. 

Hope you enjoy this lovely autumn treat! I'm using apples or pumpkin something in almost all my recipes the last couple weeks and it feels so festive!!  I also have been loving all the colorful leaves and crisp air around here so I snapped a couple pics of my front yard.  Happy autumn days to you!! XO


*The graphics added to my pics (other than the first one) are from Studio Calico's Underground Digital Scrapbook Kit Stamps and Underground Background Cut File by Paige Evans.

Monday, July 21, 2014

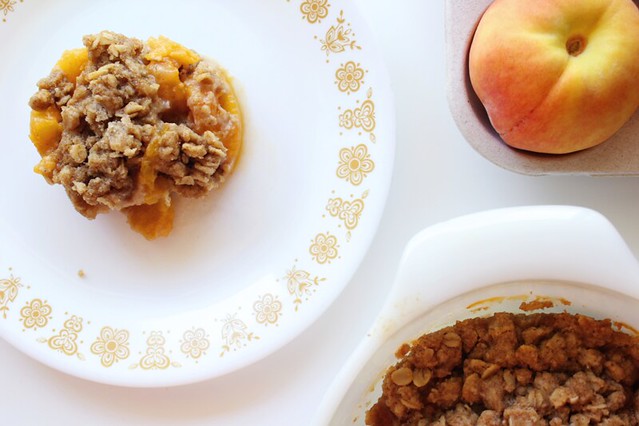
{recipe} fresh peach crisp

{recipe} fresh peach crisp

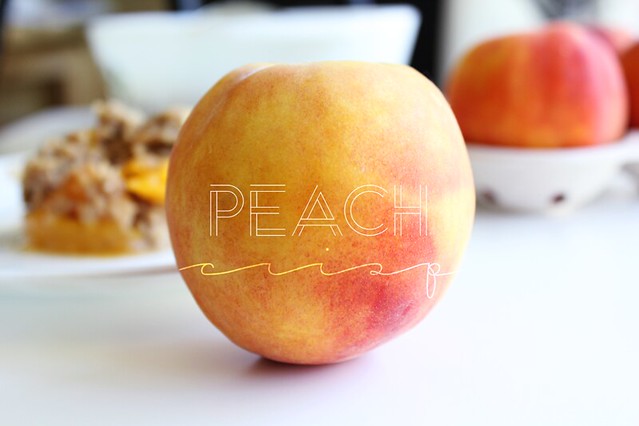
Summertime means fresh fruit, so the other day I was thinking.  What can I make for dessert that doubles as breakfast?

FRESH PEACH CRISP

Serves Around 6

Ingredients:
  • 6 peaches (peeled and cut)
  • 2 tablespoons white sugar
  • 1 cup all-purpose flour
  • 1 cup rolled oats
  • 3/4 cup packed brown sugar
  • 1/2 teaspoon ground cinnamon
  • 3/4 cup butter
  • pinch of salt

{recipe} fresh peach crisp | serving size

Directions:
  1. Preheat oven to 350 degrees F (175 degrees C).
  2. In a large bowl, gently toss together the fresh peaches and white sugar; set aside.
  3. In a separate bowl, combine flour, oats, brown sugar, salt and cinnamon.  Cut in butter until crumbly.
  4. Pour peach mixture into a 1 1/2 quart Pyrex baking dish.  Sprinkle crumble mixture over the peaches.
  5. Bake in preheated oven for 30 to 40 minutes, or until fruit is bubbly and topping is golden brown.
To Make This Gluten Free:  I replaced the all purpose flour with the same amount of Bob's Red Mill Brown Rice Flour, and the rolled oats with Bob's Red Mill Gluten Free Old Fashioned Rolled Oats.  It was so good.  Ryan even ate it two days in a row ; )

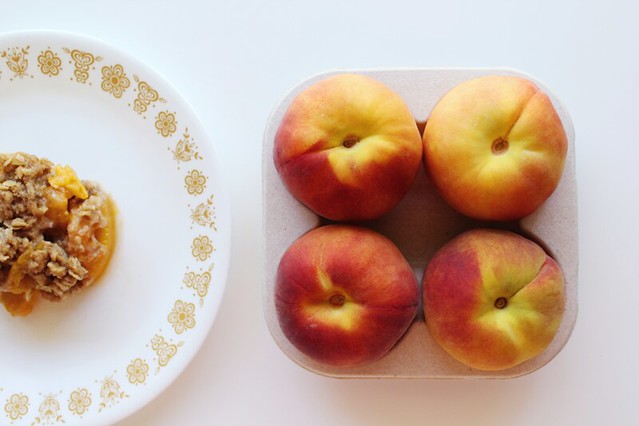
How To - Peel Fresh Peaches:  I'd never peeled a fresh peach before, so I had to look this up.  This way is quick and easy.  
  • Place peaches in a large pot of boiling water for about a minute or until the skin splits.
  • Remove the peaches from water with a slotted spoon.
  • Use a paring knife to peel the skin, which should easily peel off.

Notes:  I used smaller peaches so I ended up having a little extra crumble mixture.  It is saved in the refrigerator and will make about 2 individual size crisps which I'll bake this week....maybe cherry!  Also this recipe is VERY rich, so we ate smaller portions than normal.


{recipe} fresh peach crisp | peaches

Tuesday, January 28, 2014

{recipe} bbq pork & fancy green beans


This recipe may not look like much, but it's my favorite thing I've made so far this month other than the baked donuts!  For the pork I just decided to go for it without using a recipe, and it turned out great!  The fancy green beans are my version of The Pioneer Woman's Best Green Beans Ever, and are pretty much identical to hers with a couple minor changes.

One of the reasons I like to share yummy food here on my blog is because it's also my recipe book of sorts.  When I'm visiting family, or away from home, it's so easy to access my favorite recipes here....and it really helps to have my notes about little details most people take for granted since I don't cook much : )


BBQ Pork Tenderloin
Serves 4

Ingredients

1 small pork tenderloin
1 bottle TJ's Bold & Smoky Kansas City Style BBQ Sauce
Sea salt
Ground black pepper
Extra virgin olive oil

Directions

Preheat oven to 350 degrees.  Line a baking sheet with aluminum foil.  Add the sea salt, pepper, and olive oil to both sides of the pork tenderloin and place on your baking sheet.  Cook for 30 to 50 minutes, until safe interior temperature is reached checking with a meat thermometer (you're thermometer will be labeled).  Once fully cooked, use two forks to shred the pork into bit size pieces.  Turn your crock pot on high.  Add all the shredded pork and the full bottle of BBQ sauce into the crock pot.  Cook for 1 hour, stirring occasionally.  Serve warm.

Notes:  My meat thermometer is broken, so I ended up overcooking the pork just to be safe (it was a very small pork tenderloin and I cooked it for the full 50 minutes.  This worked out fine, since it became extremely moist from simmering in the BBQ sauce.


Fancy Green Beans
Serves 4

Ingredients

4 oz fresh green beans (approximately)
Grease from 6 strips of bacon
2 cloves garlic, minced
3/4 large onion, chopped
1 cup chicken broth
1 red bell pepper, chopped
1/2 teaspoon sea salt
Ground black pepper

Directions

Cook 6 strips of bacon, leaving the bacon grease inside your skillet/pan.  Package up the bacon and refrigerate for a later snack.  Cut off the stem ends of the green beans (I used a package of Trader Joe's fresh green beans). Add the garlic and onions to your skillet with the bacon grease and cook for a minute. Then add the green beans and cook until the beans turn bright green, about a minute. Add the chicken broth, chopped red pepper, salt and pepper to taste. Turn the heat to medium (or low depending on how hot your skillet gets) and cover the skillet with a lid, leaving the lid cracked to allow steam to escape. Cook until the liquid evaporates and the beans are a little soft, yet still crunchy, 20 to 30 minutes. You can add more chicken broth during the cooking process (if it evaporates too quickly), but don't be afraid to let it all cook away so the onions and peppers can start to caramelize.

Notes:  I don't have a lid for my stove top pan, so I used a larger lid that fit over most of the ingredients with lots of room for steam around the edges.  Because of this, I had to cook my green beans on medium-low for 15 minutes and medium for 15 minutes.  After, the green beans were perfectly cooked while still crunchy, but there was quite a bit of chicken broth left.  Next time I'll probably use a little less broth so the veggies will caramelize even more.  I recommend serving the green beans with all the cooked veggies for amazing flavor.


I cannot recommend trying these two recipes together more.  They compliment each other perfectly!  Hope you enjoy!!  XO

Wednesday, January 15, 2014

{recipe} baked mocha french toast

 
I love breakfast for dinner, so on Monday night I tried a little experiment, and mixed the Barefoot Contessa's recipe for French Toast Bread Pudding, with the High Life's Cafe Mocha French toast.  The result:  YUMMY.  Here's how I did it.....


BAKED MOCHA FRENCH TOAST 

Ingredients
  • 1 loaf of bread (or enough to fill up your baking dish 3/4 of the way to the top, I used whatever sandwich bread I had on hand) 
  • 8 extra-large eggs 
  • 5 cups half-and-half 
  • 2 tablespoons espresso powder 
  • 1/2 cup cocoa powder 
  • 1 teaspoon pure vanilla extract 
  • 1/4 teaspoon kosher salt 
  • 5 tablespoons butter 
  • 1/4 cup hazelnut syrup (I used the kind found in the coffee isle at the grocery store) 
  • powered sugar and extra butter for serving 

Directions 

Preheat the oven to 350 degrees. 

Arrange the bread in layers 3/4 of the way to the top of your 9 by 13 by 2-inch baking dish, cutting the bread to fit the dish. ***I actually split this recipe into two batches, a regular and gluten free version, so I used two smaller Pyrex dishes that both fit inside my roasting pan. 

In a large bowl, first whisk the eggs, then add the half-and-half, cocoa powder, vanilla, salt, and hazelnut syrup.  Set aside. 

In a microwave safe container, melt the butter in the microwave, then add the espresso powder, stirring well.  Add this mixture to the other liquid mixture until well combined. (It's a lot so you'll need a big bowl.)

Pour the finished mixture over the bread and press the bread down. Allow to soak for 10 minutes. Note: this was perfect for regular bread, but not enough soak time for gluten free bread.  I soaked the gluten free for 15 minutes with a weight on top of the bread (I just used another heavy dish) to submerge it in the mixture and it still wasn't quite long enough.  Next time I'll try 20 or 30 minutes.

Place the baking dish(s) in a large roasting pan and add enough very hot tap water to the roasting pan to come an inch up the side of the baking dish(s).

Cover the roasting pan tightly with aluminum foil, tenting it so the foil doesn't touch the pudding. Make two slashes in the foil to allow steam to escape. 

Bake for 45 minutes, remove the aluminum foil, and bake for another 40 to 45 minutes, until the pudding puffs up and the custard is set. Remove from the oven and cool slightly. Lightly dust with powdered sugar and serve hot in squares with butter.

*Additional Notes:  The regular bread version turned out perfectly.  Ryan said he wanted me to make it again.  The gluten free version had a thick layer of custard underneath the layers of bread since I didn't soak the bread long enough.  I still really enjoyed the bread part, but the custard alone was just okay.  Next time I'll soak it longer and probably pour out more of the excess custard mixture after the soaking process.

*Also, since this recipe takes almost 2 hours to complete from start to finish, make sure to plan ahead.  Serves 6 to 8 : )


***The great thing about this recipe is that you can really add any ingredients to the base custard (eggs and half and half) so you can flavor it however you want.....and bonus, your not standing over a hot stove, just pop it in the oven, go about with your morning, and enjoy when done!  XO

Saturday, January 4, 2014

{recipe} baked donuts


Happy New Year!  I still haven't caught up on my Christmas Countdown Mini, but really enjoyed a lot of time with family over the holidays.  Lately I've been taking a little time to relax before starting up my projects, so you'll be seeing more crafty goodness here soon : ) 

Today however, started out with Ryan waking me up, and reminding me that I had promised to make donuts this morning.  I promptly popped out of bed (a rarity for me) and baked these yummy treats first thing.  The last two evening's I've been watching the Barefoot Contessa, and was inspired to try THIS recipe of hers with a few minor alterations.


Cinnamon Sugar Baked Donuts
Makes 12 to 14 donuts

Ingredients:
Baking spray ( I used Pam)
2 cups all-purpose flour
1 1/2 cups sugar
2 teaspoons baking powder
1 teaspoon ground cinnamon
1/2 teaspoon ground nutmeg
1/2 teaspoon sea salt
1 large egg, lightly beaten
1 1/4 cups half and half
3 tablespoons unsalted butter, melted
2 teaspoons pure vanilla extract

For the topping:
10 tablespoons unsalted butter
1/2 cup sugar
1/2 teaspoon ground cinnamon

Directions:
Preheat the oven to 350 degrees. Spray 2 doughnut pans well.

Into a large bowl, sift together the flour, sugar, baking powder, cinnamon, nutmeg, and salt. In a small bowl, whisk together the egg, half and half, melted butter, and vanilla. Stir the wet mixture into the dry ingredients until just combined.  I used my mixer.

Spoon the batter into the baking pans, filling each one a little more than three-quarters full. Bake for 15-17 minutes, until a toothpick comes out clean. Allow to cool for 5 minutes, then tap the doughnuts out onto a sheet pan.

For the topping, melt the 10 tablespoons of butter in an 8-inch saute pan. Combine the sugar and cinnamon in a small bowl. Dip each doughnut first in the butter and then in the cinnamon sugar.  I only dipped one side, and left the other plain.

*For gluten free I made the following changes.  Instead of all purpose flour, I used white rice flour, and instead of 1 large egg I used two.  This meant that the gluten free version made 16 donuts.

*A side note:  I thought these donuts where great, but a little too sugary for me....next time I will try a little less sugar.  Also, Ryan really enjoyed the gluten free, even though I made both, so he said next time I only need to make the gluten free version which is great!


In addition to enjoying these delicious donuts, we've also been LOVING the sweet aroma to these fresh freesia's from Trader Joe's!  The new year is lookin' good.  XO

Saturday, October 13, 2012

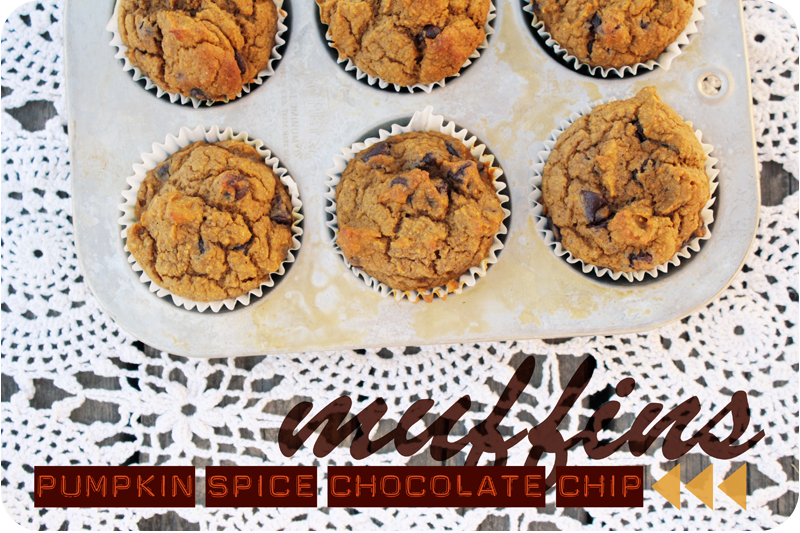
{autumn muffins} pumpkin spice chocolate chip

{muffins} pumpkin spice chocolate chip
This is my first venture in fall baking of the year. Perfect for breakfast with a little butter and a side of hot tea. Healthy and full of chocolate goodness. Enjoy!

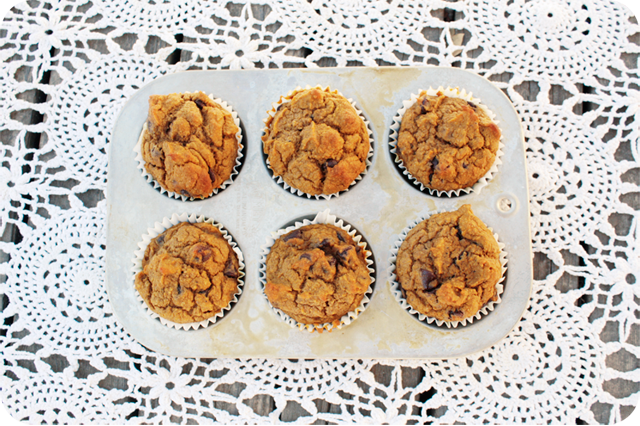
{autumn} baking
Pumpkin Spice Chocolate Chip Muffins
 
Ingredients:
  • 2 cups flour
  • 2 tsp baking powder
  • 1 tsp baking soda
  • 2 tsp ground cinnamon
  • 2 tsp ground nutmeg
  • 2 eggs, beaten
  • 1 cup pumpkin puree
  • 1/4 cup white sugar
  • 2 cups unsweetened applesauce
  • 2 tbsp vegetable oil
  • 1 tsp almond extract
  • 1 1/2 cups dark chocolate chips
Directions:
  1. Preheat oven to 350 degrees.  In a medium bowl mix together four, baking powder, baking soda, cinnamon and nutmeg; set aside.
  2. In a large mixing bowl, combine eggs, pumpkin, sugar, applesauce, vegetable oil, almond extract and chocolate chips.
  3. Slowly add the flour mixture into your mixing bowl with the wet ingredients until blended.  Do not over beat.
  4. Pour the batter into 18 paper cupcake lined muffin tins.
  5. Bake for 25 to 30 minutes, checking after 25.  Remove muffins from the oven, and let them cool slightly.  Then, remove the muffins from the tins and let them cool completely.
Notes:
 
>>> I've found that warming the muffins in the microwave before eating them for breakfast the next day with a little butter is delicious.  Also, if you are going to eat them warm, remove the paper liner before reheating otherwise the muffin with stick to the bottom of the liner.  This recipe uses a lot of chocolate chips, you may want to use less.....apparently I am craving chocolate right now.  Oh, and I used a little extra almond extract. :D  This recipe is altered from HERE. <<<

{autumn} breakfast

Tuesday, July 10, 2012

{guest post} with my creative brightside

DSC08039

Hey friends it's me, Stephanie from My Creative Brightside!! So happy to be over here at Blume and Grow doing a fun guest post on a nice ice cold summer treat. Ice cube creations seem to be all the rage now a days and I thought it would be fun to make up some of my own. These are great to add to any drink, not just the ones I have made.
  DSC08046

Plain and Simple Directions:
  • Brew your desired tea as directed.
  • Freeze ingredients such as chamomile flowers, mint leaves and pure lime juice into ice cube trays.
  • Drop them in and let the party begin.
  DSC08048 DSC08047

A big thanks to Stephanie for this guest post! These refreshing treats look amazing!!! I officially now inspired to make some of my own :D

And if you are interested is seeing a DIY on how I created my Summer Wishes Mini cover, hop on over to her blog today. Happy Tuesday!  <3 Carrie

Thursday, June 28, 2012

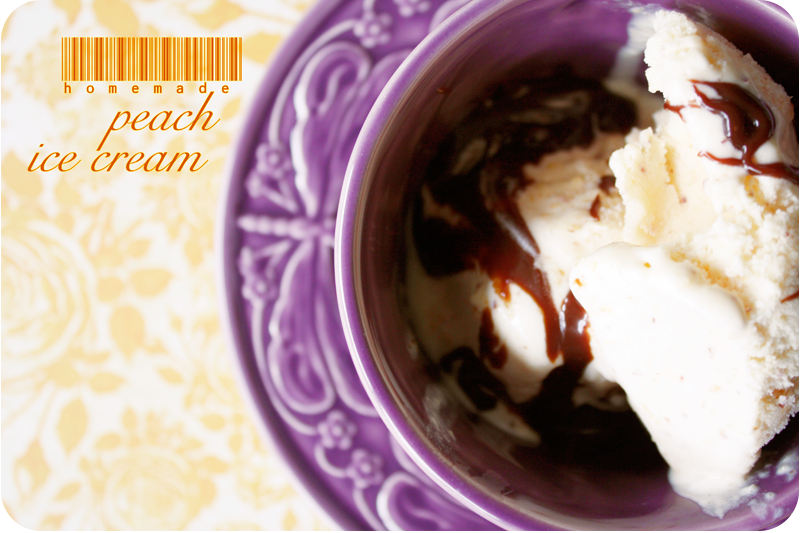
{summertime treat} homemade peach ice cream

{homemade} peach ice cream
Fresh fruit is one of my favorite foods during the summer.  It seem to fit in perfectly with the fresh and sweet feeling that summertime brings. 

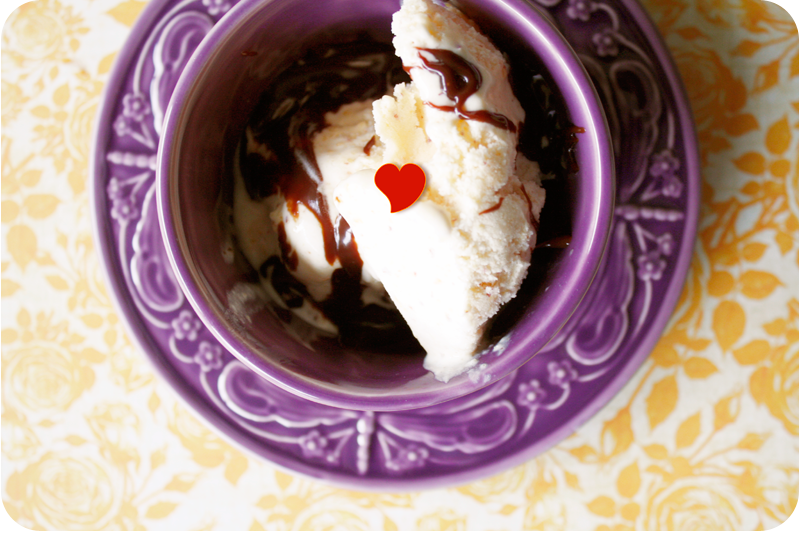
The other day I told Ryan I was going to make some homemade ice cream and asked if he had a preference as to the flavor.  He suggested peach.  Personally I thought is sounded a little gross (I don't like chunks of frozen fruit in my ice cream), but decided to be adventurous and give it a try.  I modified THIS recipe late that night while watching The Stepford Wives on my laptop in the kitchen (which is my new favorite thing).....what I ended up with is the perfect seasonal treat!  I still cannot believe how rich, creamy and delicious this ice cream is.  And then Ryan bought Mrs. Richards Hot Fudge at the grocery store.  Holy cow.  The combination of the two is pure magic.  It is great as a nighttime indulgence, but would also be excellent to bring to a picnic or barbeque.  I think I am going to make another batch for 4th of July.  Enjoy!  <3 Carrie

{peach ice cream} with hot fudge
Homemade Peach Ice Cream

Ingredients:
  • 3 eggs, beaten
  • 1 3/4 cups white sugar
  •  4 fresh peaches, pitted and chopped
  •  2 cups heavy cream
  •  1 cups half-and-half cream
  •  1 teaspoons vanilla extract
  •  1/2 teaspoon salt

Directions:

  1. In a large bowl, mix together eggs and sugar until smooth; puree peaches in food processor until all chunks are gone and the texture is smooth.  Stir 2 1/2 to 3 cups of puree into egg mixture. Stir in cream, half-and-half, vanilla and salt and mix well.
  2. Pour mixture into freezer canister of ice cream maker and freeze according to manufacturer's instructions.  My ice cream maker would only hold about 2/3 of the mixture, so I had to do two batches.  After the ice cream maker is finished with each batch, transfer the ice cream into a freezer safe storage container and place in the freezer.  Mine took 30 to 40 minutes per batch, and then the ice cream took about 2 hours to set up completly in the freezer.
*This recipe contains raw eggs. It is recommended that pregnant women, young children, the elderly and the infirm do not consume raw eggs.

Thursday, June 21, 2012

{the perfect} parfait

{yogurt} ricotta parfait
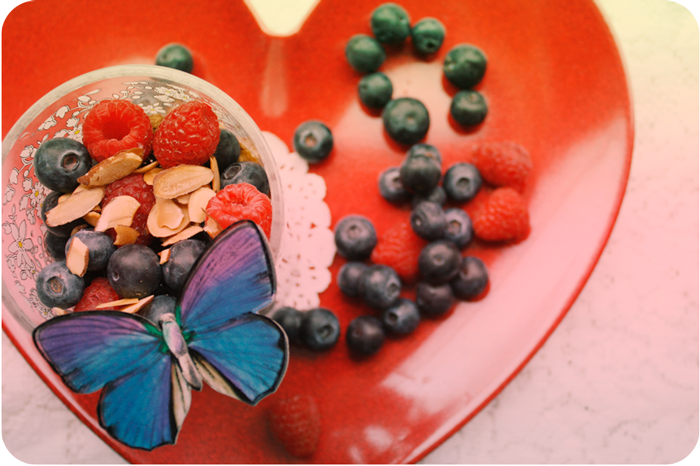
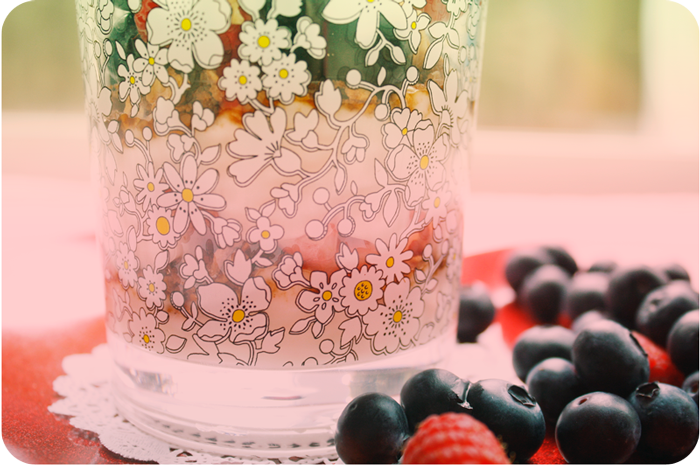
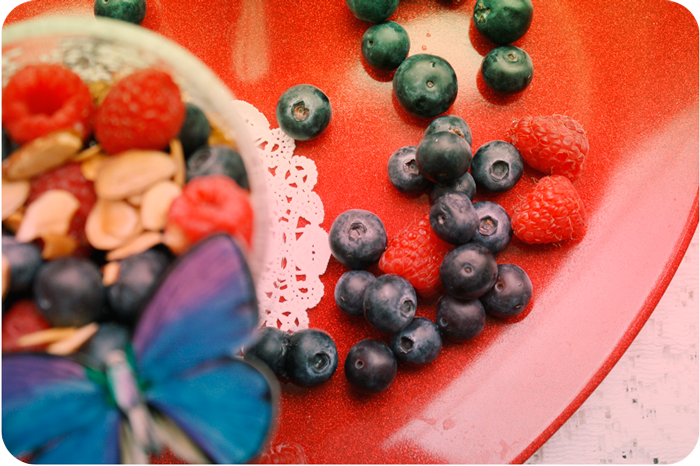
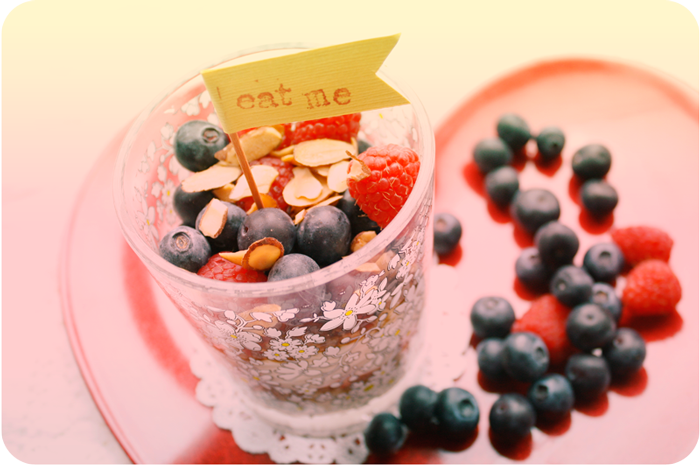
For my lovely mother's birthday last month I decided to try out Giada's Ricotta Parfait Recipe for breakfast before a morning of garage sailing.  It was a big hit, and since then I've tried all sorts of variations on her recipe.  Here's a look at one that I love.....

{layers} of delicious {fresh} berries {eat me}
 Yogurt Ricotta Parfaits (by Giada De Laurentiis)

Ingredients:
  • 1 cup ricotta cheese
  • 1/2 cup plain yogurt
  • 1/2 cup raspberry jam, divided
  • 2 cups granola, divided
  • 1/2 cup sliced almonds, toasted*

Directions:

In a small bowl, whisk the ricotta cheese and yogurt together until smooth. In each parfait glass, layer 2 tablespoons of the ricotta mixture, 1 tablespoon raspberry jam and 1/4 cup of granola. Repeat the layers. Spread the remaining ricotta mixture on top and garnish with toasted almonds before serving.

*Cook's Note: To toast the sliced almonds, arrange them in a single layer on a baking sheet. Bake in a preheated 350 degrees F oven for 6 to 8 minutes until lightly golden. Cool completely before using.

My Notes:

I've noticed that the ricotta texture is more or less course depending on the brand you use.  Precious Part Skim Ricotta was more course, and Frigo Part Skim Ricotta was less course.  Also, I've only tried this recipe with vanilla or strawberry & honey flavored yogurts, not plain.  The Lucerne Vanilla is inexpensive and good, but right now my favorite is the Greek Gods Yogurt!  Every flavor I've had of theirs I've loved.  Another alternative is right now I prefer fresh berries to the raspberry jam.....however, the raspberry jam is excellent in it!  I also highly recommend adding lots of toasted almond slices.  The nuttiness brings all the flavors together.

I am in the process of learning to make the perfect homemade granola, and still haven't mastered it yet.  Will share that recipe once I have.  I hope you enjoy this lovely summer breakfast as much as I do!  <3 Carrie

Thursday, May 31, 2012

{red velvet} cupcakes

{red velvet} cupcakes

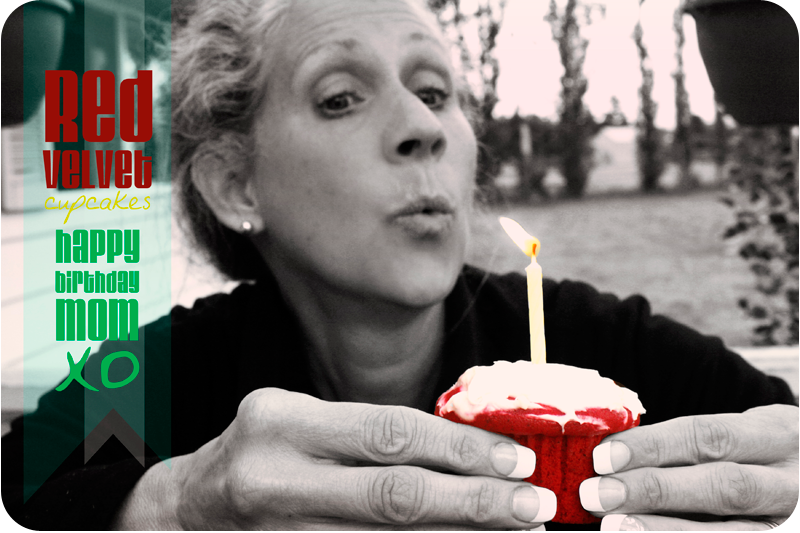
Over the weekend I decided to try and turn gluten free yellow cake mix (from the box) into red velvet cupcakes for my mom's birthday.  They were such a hit with everyone that I thought I'd share the recipe here too!  Here's what worked for me:

Red Velvet Cupcakes

Ingredients:
  • Yellow cake mix (I used this gluten free box)
  • 1 package instant vanilla pudding
  • 4 large eggs
  • 1 tablespoon cocoa powder (I used this one)
  • 1 tablespoon distilled white vinegar
  • 1 cup milk
  • 1/2 cup vegetable oil
  • 2 ounces red food coloring

Directions:

Preheat oven to 350 degrees.  Combine all the ingredients together and mix for 4 minutes or until your batter is combined and medium weight.  Using cupcake liners, scoop batter till each liner is 3/4 of the way full.  Bake for 30 minutes or until toothpick comes out clean.  My batch made about 16 cupcakes.  Serve topped with your favorite cream cheese frosting.

Notes:

I was very happy with the rich red color of the cupcakes.  They really did come out the same brightness as in the photo above.  They were also light and fluffy.  The flavor was just sweet enough so I could add as much cream cheese frosting as I liked (and I like a lot ; ).  Everyone loved them, even Ryan which is a rarity.  Definitely going to have to make them again.  <3 Carrie

Tuesday, May 29, 2012

{what's for lunch} tea & cake

{what's for lunch} tea & cake

This afternoon I decided to take a break and pop in for a quick sec to share the most delicious treat!

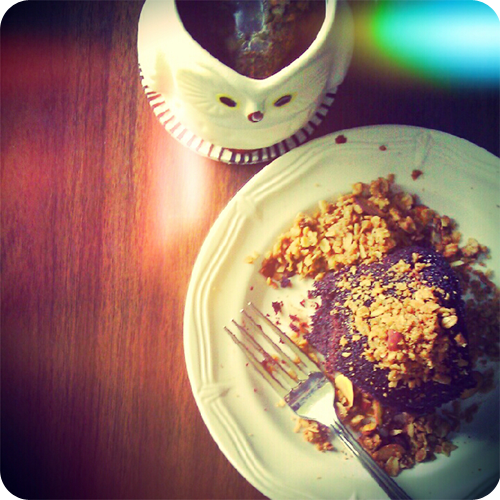
Last night after arriving home from visiting my family over the long weekend I made gluten free devils food cake in a bunt pan and baked the chocolate fudge frosting inside.  This afternoon I knew I wanted it for lunch, so I warmed it up in the microwave, sprinkled some homemade gluten free granola with toasted almonds on top, and paired it with the cherry vanilla tea from The Coffee Bean & Tea Leaf.  It was AMAZING.  The cake was moist, the granola was crunchy, the almonds were toasty, and the tea was fruity.  THE BEST combo.  Period.  You have to try it.  <3 Carrie

Side note:  Since I added the frosting to the batter, I ended up baking the bunt size for 50 minutes total before it was cooked through.

Saturday, April 7, 2012

{this} week

{red velvet} cupcake

This week I am:

  • Loving the gluten free red velvet with cream cheese frosting cupcakes from 2 Good 2 Be Cafe
  • Excited about wearing an Easter dress
  • Enjoying The M photography class by Kara Haupt
  • Packing up our sunny bathroom goods and miscellaneous odds and ends throughout our home
  • Still looking for a house with a fenced yard (for the puppies) to rent in Edmonds
  • Wishing I could make time to go to the movies (there are so many fun ones out right now)
  • Drinking lots of hazelnut decaf dry cappuccinos to give me that little extra burst of energy
  • Madly trying to finish up a big craft project for a friend
  • Thrilled that Instagram now has an App for Android!
  • Reminded often how much I love My Sweetie
  • Unhappy that Ponyo just started blowing his coat for Spring (great timing, huh?!?)
  • Feeling somehow peaceful in all this madness
  • Spending sweet time with good friends at Balboa Park for a picnic and photo fun
  • Listening to the sultry voice of Lindsey Pavao on the track Somebody I Used to Know
  • Kind of in shock that this is our last weekend in San Diego!
  • Smelling the fresh and calming scent of my Coconut Water candle from Bath and Body Works
  • Thinking I might add a little pink to my hair

What have you been up to?  <3 Carrie

Friday, September 16, 2011

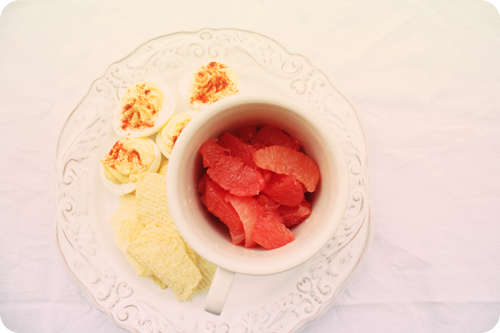
{day 16} what i ate

{september} what i ate

For lunch today:
  • 4 deviled eggs
  • baked ruffles potato chips
  • lots of pink grapefruit
And this really is a typical lunch for me.....except usually I eat nuts too (but I'm all out right now).  This, and a big glass of ice tea (because it's still not quite warm enough for warm drinks here yet).  Keeping my fingers crossed, though ; )  What's a typical lunch for you like?  <3 Carrie

Saturday, September 10, 2011

Your Appointment with Saturday

For this week's photo prompt I wanted to focus on summer as it begins to come to a close. The prompt is to capture something that has become.....

A New Summer Tradition

{september} something i made

(These photos also happen to be my day 10 *something I made* photos for the 30 day photo challenge I'm doing this month over on my personal blog, Blume & Grow.  Fun!)

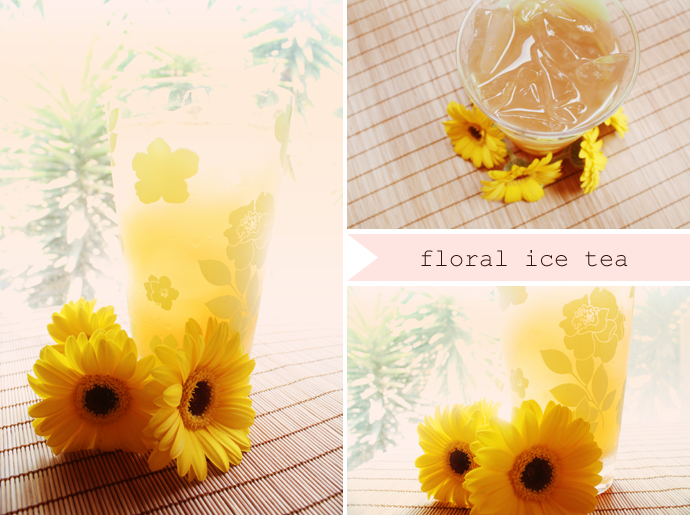
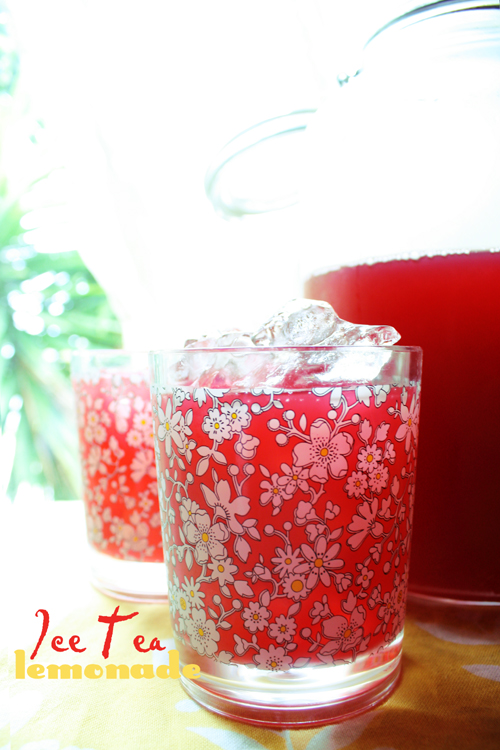
I have never really been a big ice tea fan, but this summer I started mixing homemade ice tea with different things like lemonade or flavored sparkling water.....and it's stuck.  I love it!!!  I've tried quite a few different mixtures and here are some of my favorites:
  • Tazo Rest (rose petals, valerian root and citrusy herbs) mixed with Simply Limeade (pictured above).  This one tastes like you're drinking a flower.....it's floral and refreshing.
  • Tazo Refresh (mint with a pinch of tarragon) mixed with Simply Raspberry Lemonade.  Mint and raspberry's are so great together, and this is no exception!
  • Celestial Seasonings Black Cherry Berry mixed with Simply Raspberry Lemonade.  This ice tea is sweet and tart.....and so delicious.
If you're interested in the actual recipe I use, you can find it HERE on a guest post for My Creative Brightside.  I use the same steps and ratios for each one, so all you have to do is replace the corresponding ingredients with ones of your choice.  It's really easy, and a real treat to have at home or to throw into a travel mug for the road.

What's a new tradition that you've started this summer?

Have a wonderful day!
Love, Carrie

Tuesday, September 6, 2011

{day 6} childhood memory

{september} childhood memory

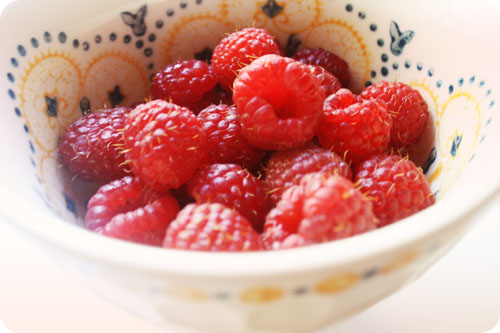
One of my most vivid and favorite childhood memories is eating golden raspberries.  We would play outside building forts, exploring the woods, and just messing around during those wonderful summer months up in Washington.  When it was time for a break, I would head over to our garden where golden raspberries grew on a wire and wood fence.  The afternoon sun would warm them up so when you popped them in your mouth the sweet juice was amazing!  This summer raspberries have been my favorite fruit, so I thought it would be perfect to take a photo of the ones in my fridge for today's *childhood memory* prompt.  Delicious.  <3 Carrie

Monday, July 11, 2011

*thai peanut chicken*

(Serves 3)


Ingredients

•    1 cups uncooked white rice
•    1 1/2 cups good-quality coconut milk, plus a dash more
•    1 1/4 cups water
•    1/2 tsp. coconut oil, OR vegetable oil
•    3 tablespoons soy sauce
•    2 tablespoons creamy peanut butter
•    2 teaspoons white wine vinegar
•    1/4 teaspoon cayenne pepper
•    3 tablespoons olive oil
•    2 skinless, boneless chicken breast halves - cut into thin strips
•    1 1/2 tablespoons chopped garlic
•    1 tablespoon chopped fresh ginger root
•    1/2 cup chopped green onions
•    ½ of a sliced red bell pepper
•    1 cup of chopped cabbage
•    ½ cup of shredded carrots
•    ½ cup of sugar snap peas
•    1/4 cup unsalted dry-roasted peanuts chopped into small pieces

Directions

1.    Start with preparing the coconut rice.  Rub oil over the bottom of a deep-sided pot. You will also need a tight-fitting lid.
  • Place rice, coconut milk, water, shredded coconut, and salt in the pot and set over medium-high to high heat. Stir occasionally to keep rice from sticking to the bottom of the pot and burning.
  • Once the coconut-water has begun to gently bubble, stop stirring and reduce heat to low (just above minimum). Cover tightly with a lid and let simmer 15-20 minutes, or until most of the liquid has been absorbed by the rice. To check, pull rice aside with a fork. If most of the coconut milk-water is gone, go on to the next step.
2.    While waiting for rice to simmer start prepping your chopped ingredients.
3.    Check rice after about 10 minutes…..
  • To check, pull rice aside with a fork. If most of the coconut milk-water is gone, go on to the next step.
  • Replace the lid and turn off the heat, but leave the covered pot on the burner to steam another 5-10 minutes, or until you're ready to eat. Tip: Your Coconut Rice will stay warm this way for up to 1 hour or more, great for when you're expecting company! 
  • When ready to serve, remove the lid and fluff rice with a fork or chopsticks.

4.    Once your chopped ingredients are ready, in a small bowl, stir together the soy sauce, peanut butter, vinegar, dash of coconut milk and cayenne pepper. Set aside.
5.    Heat oil in a skillet or wok over high heat. Add chicken, garlic and ginger, and cook, stirring constantly, until chicken is golden on the outside, about 5 minutes.
6.    Reduce heat to medium, and add green onion, cabbage, carrots, red bell pepper, sugar snap peas, peanuts, and the peanut butter mixture. Cook, stirring frequently, for 5 minutes, or until vegetables are tender, and chicken is cooked through. Serve over coconut rice.

I have been really enjoying Thai food lately, so I decided to make one of my favorite dishes at home last week.  It's recipe I modified from allrecipies.com.  It was soooo yummy (sorry I had trouble getting a good photo.....this one doesn't do it justice)!!!  If you decide to try it, I hope you like  <3 Carrie

Tuesday, June 28, 2011

TACOS AT THE BEACH

*tacos at the beach*

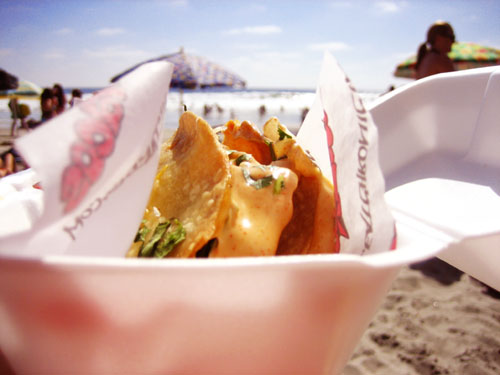
On Sunday Ryan and I spent an impromptu afternoon at the beach.....It happened like this: We had planned on getting a couple tacos and eating them at the beach. Well, as we were getting ready to head out the door, Ryan starts to change. I asked him what he was doing and he said that he was putting on his swimming trunks (which was completely unexpected). So, that's when I got excited and put on my bathing suit, we found a couple towels, grabbed our tacos and spent some enjoyable time sitting in our beach chairs. Eating lunch (and the best potato tacos EVER). People watching. Chatting. And even cooling off from the hot sun in the ocean.....the water felt so refreshing, splashing up against my shoulders as I stood waist deep.

At one point I was evaluating all the ugly beach umbrellas, wondering why there were no pretty ones until this beauty caught me eye.....

*a pretty umbrella*

I think it's just perfect.....so I snapped a photo of course ; )

Happy summertime lovelies!!! <3 Carrie

Monday, June 27, 2011

WHAT'S FOR LUNCH

*lunch*

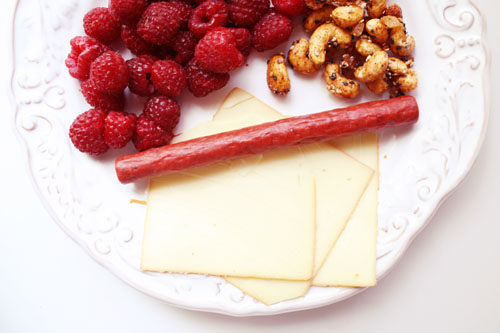
Today I thought it would be fun to share what a typical weekday lunch looks like for me:
  • Lots of fresh fruit (raspberries are my favorite this summer)
  • Seasoned nuts
  • A sausage beef stick
  • Cheese
That's pretty much it other than something refreshing to drink like ice tea or a cherry coke zero.  And today it just so happens that I have this movie on while working on my projects/Pumpkin.....Bringing Up Baby.....


I like to have movies on while I work.  The background noise, and looking up here and there to see something pretty on the TV, seems to work really well for me.....


This movie in particular is very sweet, beautiful to look at, and makes me laugh out loud quite a bit.  Katharine Hepburn is adorable and very quirky.  Plus, having a real leopard as one of the main characters is really fun.

Well, I'm off to get stuff done.  Have a lovely week!!!  <3 Carrie

Wednesday, April 20, 2011

Wednesday ~ Heart Flutter

*Ice Tea Lemonade*

(Makes 1 gallon of Ice Tea)

Ingredients
  • 7 or 8 bags Tazo Passion Tea (tied together with paper ends cut off)
  • 2 quarts water
  • 2 quarts Simply Lemonade
  • Ice
Directions
  1. Boil 2 quarts water in large stove top pan.  
  2. Remove from heat and add tea bags by siring them in.  
  3. Place lid over pan and seep for 1hr. and 15 minutes.  
  4. Add lemonade to pan and stir together.  
  5. Once cooled poor into glass pitcher with lid to keep fresh in refrigerator.  
  6. Serve over ice.
My heart flutter for today is this amazingly refreshing and fragrant ice tea lemonade.  I was inspired by the Passion Tea Lemonade I used to get over the summer at Starbucks and decided to come up with my own recipe which I think is just as delicious.  Best thing about it is that it is so simple to make, and then you have enough ice tea to last for pretty much an entire week!  Plus, when you're drinking it the crisp fragrance is sweet and makes me smile : )  Next I'm going to try using other flavors.....like maybe blueberry tea with raspberry lemonade?!?  What favors do you like together?  Hope your day today is lovely! <3 Carrie

Saturday, March 26, 2011

The Carrie Shot

*The Carrie Shot*
  • Finlandia Grapefruit
  • X-Rated Vodka
  • Hypnotic
  • Watermelon Pucker
  • Pineapple Juice
At the 7 Cedars Casino the other day I sat down at the bar.  It was the day after St. Patrick's Day and so there was a live band that was playing Irish drinking music, which I was enjoying.  When they played the traditional Irish songs, I could close my eyes and remember how it felt to be there.  Lovely.  Only problem was, not being able to drink beer (I LOVE Guinness), I had no idea what to order.  This sweet bartender who just so happens to be a friend of my sister asked me what I wanted.  My face had a blank expression.  I told her I had no idea, except that a fun shot without Kahula or Bailey's sounded good.  And so she made up this awesome shot and named it after little old me!!!  I took a sip and loved it!  Refreshing, sweet, tart and very crisp.....perfect for Spring : )  The rest of the evening all my friends (except the DD) and the other bartenders ended up trying it.  Honestly it wasn't a hit with everyone, but those who liked it really liked it.....and they all thought it was fun to try something different.  That was a fun night.  I have Joey, my Mom and Waylon to thank for that!

Happy Saturday everyone!!!
<3 Carrie